
To install the DSL Forge, go through the following steps.
Install Eclipse
To know which package is the most appropriate for you, select one of the following alternatives.
- Eclipse IDE for Java EE Developers
In this scenario, users are interested in having a DSL editor shipped with HTML/JavaScript applications. The generator outputs a static web project ready to be debugged under Eclipse. The most appropriate distribution to use is Eclipse IDE for Java EE Developers as it comes with a simple HTTP Preview server easy to configure.
- Eclipse for RCP and RAP Developers
If you want a closer integration with Xtext and EMF, or if you want to integrate the editor with other Eclipse components, you’d better install Eclipse for RCP and RAP Developers. This makes it possible to integrate the editor with third party RWT (Remote Widget Toolkit, the web-based SWT) plugins and widgets.
Install the Xtext SDK
Install Xtext Complete SDK from Eclipse update sites:
- DSL Forge v0.9.0 uses Xtext 2.10 and RAP 3.1.0 (Neon), download from https://download.eclipse.org/releases/neon
- DSL Forge v0.8.0 uses Xtext 2.8.4 and RAP 3.0 (Mars), download from https://download.eclipse.org/releases/mars
(Help>Install New Software).
Install DSL Forge Tools
Use the update site https://dslforge.org/downloads/tooling/repository/
Done! Start developing a web front-end for yout DSL!
About Target Platforms
By default, the Eclipse IDE compiles all projects in the workspace against the running platform, sometimes the IDE itself, sometimes not. RAP applications are compiled against the Equinox Basic Target. More info about setting targets can be found at the Eclipse RAP Developers Guide.
There are two ways to set the target: you could either import the base target platform (may contain features you are not interested in, but everything is there to run the examples), or use the generated target platform.
- Use the Generated Target Platform
From version 0.9.x, DSL Forge Xtext/RAP Generator generates a target platform per-DSL.
- Import the Text Editor Demo Target Platform
The easiest way to set the target platform directly from Git repository. Here are the steps:
- Clone the repository: git clone https://github.com/plugbee/dslforge.git
- Import org.dslforge.runtime.target,
- Open the target file (e.g. neon.target) and let P2 do the rest (this may take a while).
- Compose your own Target
Create a new target definition file and compose the features from P2 repositories: press “Add Software Site” and enter the URLs of the repositories you want, then select the features you are interested in. For example if you are targeting Neon releases, use the following repositories:
- Eclipse Mars: https://download.eclipse.org/releases/neon
- DSL Forge Runtime: https://dslforge.org/downloads/runtime/repository/
Below an example of a target platform which, in addition, uses some of the RAP Incubator components (Tabbed Properties View, Common Navigator), Gemini JPA and EclipseLink for persisting resources metadata.
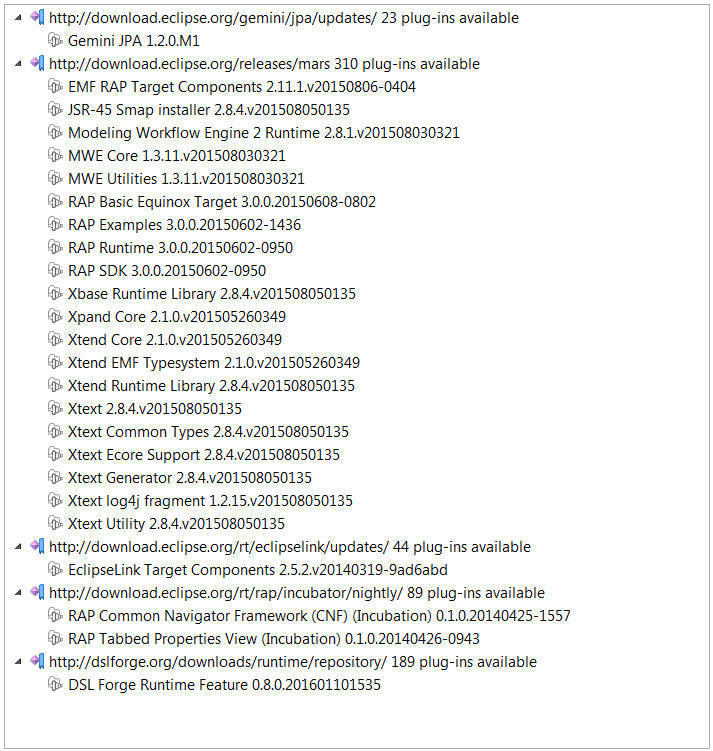
DSL Forge Target Example
Activate the target platform by clicking the link “Set as Target Platform” in the upper right corner of the target editor.
You’re done now, let’s start with a first DSL example!